Frappe_Document
    ErpNext is a free and open-source integrated enterprice resources

planning(ERP) software developed by frappe technology pvt.Ltd. And built on

MariaDB database system using Frappe, a python based server- side framework.
Introducion of Frappe
Frappe is a full stack, batteries- included, web framework written in

python and javascript . It is the framework which powers erpnext. It is pretty

generic driven apps.
Meta data driven
It is a first class citizen in frappe. It is used to generate database
tables, design forms and configure a lot of features. Meta –data is stored in a
model which is known as DocType in frappe.
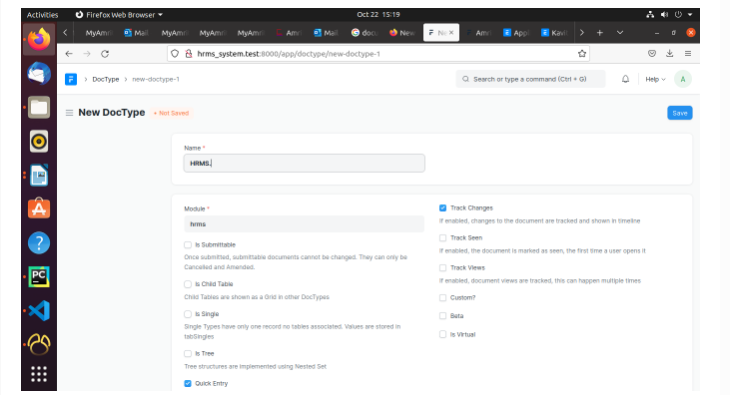
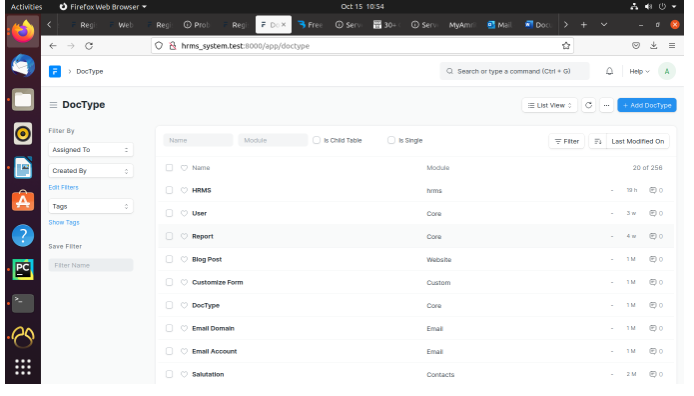
1. Create a DocType in frappe,
A DocType is the core building block of any application based on the frappe framework.It contains what fields are stored for your data, and how they behave with respect to each other. It contains information about how your data is named.
Create a New DocType
 1. Name: Enter the name of the new DocType.
 2. Module: Enter which module would you like the new DocType to be added to
 3. Save
        2. Additional details
                 1.Fields

          To add many fields as you want. The label, Field type,
mandatory fields and other associated option can also be added here.
Table of contents
1.Create an App :
   $ bench new-app appname

      $ bench new-app hrms
        App Title (default: hrms):
        App Description: hrms system
        App Publisher: Athulya S
        App Email: athulyas@am.amrita.edu
        App Icon (default 'octicon octicon-file-directory'):
        App Color (default 'grey'):
        App License (default 'MIT'):
       'library_management' created at /home/frappe/frappe-bench/apps/hrms

        Installing hrms
        $ ./env/bin/pip install -q -U -e ./apps /hrms
        $ bench build --app hrms
        yarn run v1.22.4
        $ FRAPPE_ENV=production node rollup/build.js --app            hrms
        Production mode
        ✔ Built js/moment-bundle.min.js
        ✔ Built js/libs.min.js
       ✨  Done in 1.95s.
App directory structure : apps/appname
       apps/hrms
       ├── MANIFEST.in
       ├── README.md
       ├── hrms
       │   ├── hooks.py
       │   ├── hrms
       │   │   └── __init__.py
       │   ├── modules.txt
       │   ├── patches.txt
       │   ├── public
       │   │   ├── css
       │   │   └── js
       │   ├── templates
       │   │   ├── __init__.py
       │   │   ├── includes
       │   │   └── pages
       │   │       └── __init__.py
       │   └── www
       ├── requirements.txt
       └── setup.py
2. Create a site
To create a new site, run the following command from the frappe-bench directory.
     $ bench new-site sitename

           $ bench new-site hrms_system.test
             MySQL root password:
             Installing frappe...
             Updating DocTypes for frappe        : [========================================] 100%
             Updating country info               : [========================================] 100%
             Set Administrator password:
             Re-enter Administrator password:
             *** Scheduler is disabled ***
             Current Site set to hrms_system.test
Site directory structure : Sites/sitesname
     The site directory structure will look something like this:

              sites/hrms_system.test
              ├── indexes
          │   └── web_routes
              ├── locks
              ├── logs
              ├── private
              │   ├── backups
              │   └── files
              ├── public
              │   └── files
              └── site_config.json
Access site in your browser
Now, that we have created our first site, we can access it on http://localhost:8000  in our browser.

        $ rm sites/currentsite.txt
        127.0.0.1 hrms_system.test
        $ bench --site hrms_system.test add-to-hosts
Installing an app into a site
To use an app, it must be installed on a site. Installing an app on a site means creating the models that are bundled with the app into the site, which means creating database tables in the site database.
To install an app onto a site, run the following command:
$ bench --site hrms_system.test install-app hrms
To confirm if the app was installed, run the following command:
   $ bench --site library.test list-apps
     frappe
     hrms
You should see frappe and hrms as installed apps on your site.
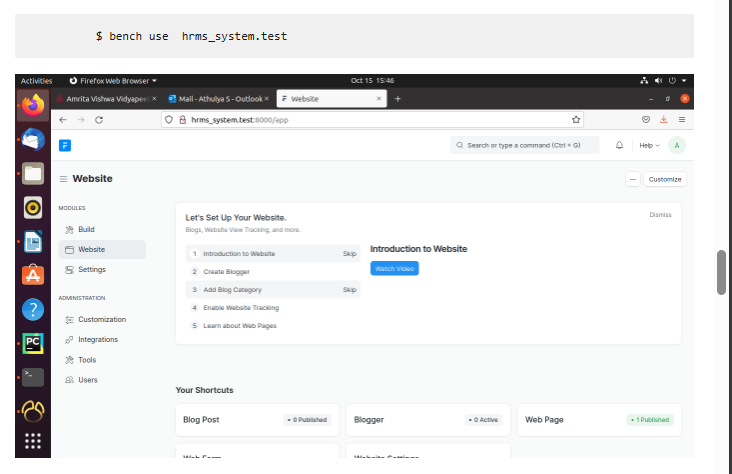
Set a site as the current site
To force a site to be used as the default site, run the
following command:
$ bench use hrms_system.test
Database table
1. $ bench –-site sitename mariadb
2. Select * from tabdoctypename
3. desc tabdoctypename;
Web page
Static Content like your Home Page, About Us, Contact Us, Terms
pages can be created using the Web Page.
To access Web Page go to:
Home > Website > Web Site > Web Page
How to create web page
  1.Go to web page list and click new
    2.Enter a title and add content in main section . The route will auto           generated but you can change it.
        3.Click on save.
        4.The web page will be published only when Published is ticked.
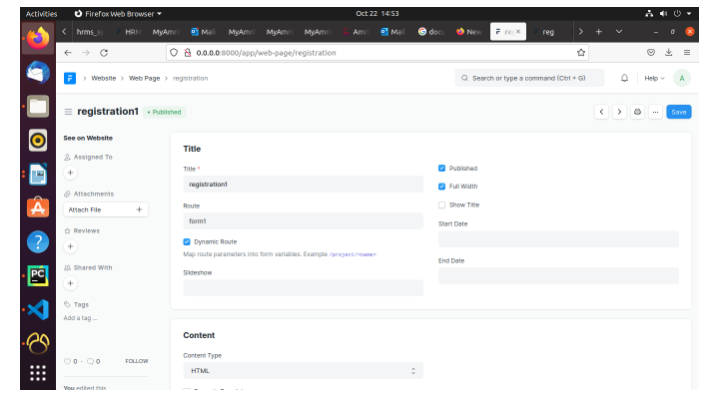
View your Web Page by clicking on See on Website in the side bar.

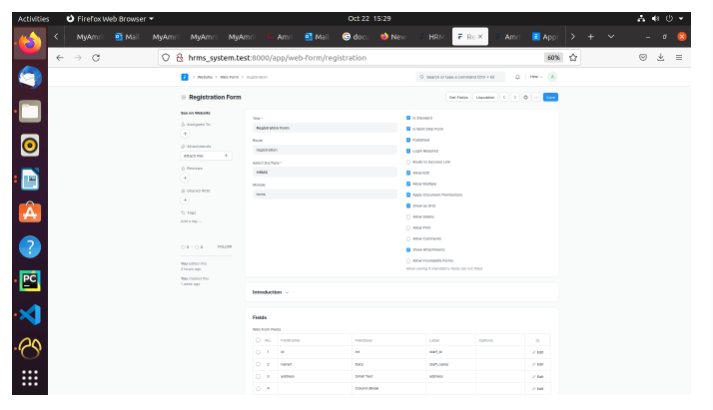
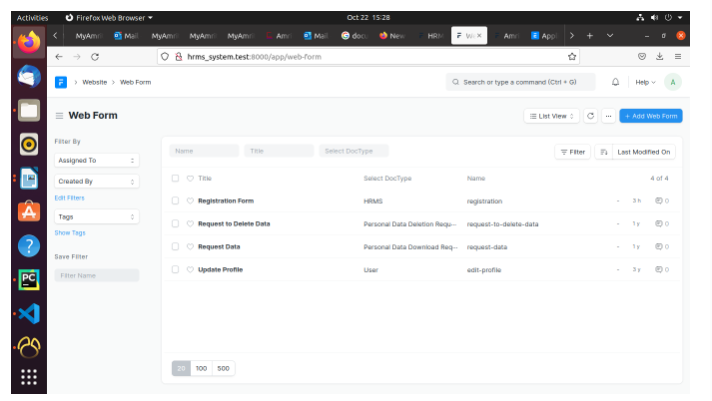
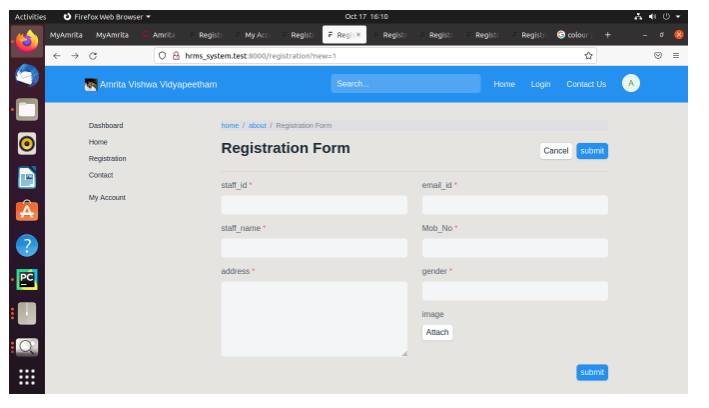
Web Form
To create a Web Form,
• Enter Title.
• Select DocType for which the record should be created.
• Select fields for your web form. These fields are populated from the DocType.